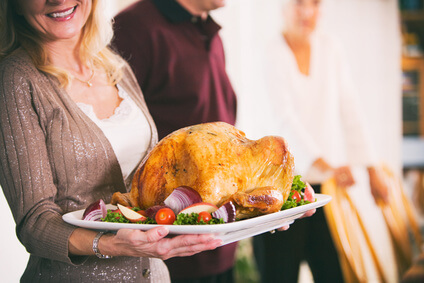
These steps will make it a breeze to glide through Thanksgiving with the perfect turkey.
1. Choose the Right Turkey for Your Table
For us, there’s no question, we want a locally raised, heritage turkey from one of our local farmers or
the farmers who supply our local butcher. Read this if you want to know more about choosing a
turkey.
2. Get Started on Time for a Great Finish
Remember that a 10 pound turkey will take 3 or 4 days in the bottom of the fridge to completely
defrost – and get started on time. Remember too, that even fresh turkeys are sometimes frozen in
shipping and can be still partially frozen when you get them from the butcher. So plan ahead. And
any brining or other prep work you want to do should be done after this, so you may need another
day for the final prep work after the defrosting.

3. Try this Method and You Won’t Need to Cook Your Turkey Upside Down
Instead of using your roasting pan and cover, try J. Kenji’s baking stone method for a better result.
You can use a simple V rack and a baking sheet with this method and get a perfect bird every time.
4. Manage the Heat for the Perfect Meat
 Hot and fast and then low and slow will work wonders when you roast this way.
Start by preheating the oven at 500°F for at least 45 minutes. Then test the temperature of the baking stone. I use my favorite IR thermometer to do this, aiming the lasers across the stone at a slight angle, and scanning the surface.
Once the stone is at 500°F you’re ready to put in the turkey.
Then turn the temperature down to 300°F and keep the oven door closed!
5. Don’t Push the Bird Past Its Peak
 Set a timer for 3 hours and do your first temperature test. For this you’ll want an accurate instant-read digital meat thermometer, so you can move quickly and get an accurate reading.
Be aware that most inexpensive “instant-read” thermometers can take 30 seconds or more to show you the final temperature after you inserted the probe into the meat, so make sure the one you’re using is fast, and of course accurate. My favorite meat thermometer is the ennoLogic eT820F, shown in the promotional banner on the right. It’s accurate within a degree or two, and takes only 5 seconds to give the reading. And it doesn’t cost more than the turkey. 🙂
There are two temperature tests you need to take to know if the turkey is ready.
The first is the test of the leg meat, This test is for a minimum temperature of just about 165°F to ensure the tougher muscle fibers of the dark meat have gotten hot enough to break down and soften.You want juicy tender dark meat as well as moist breast meat for the perfect bird.
The second test is the breast, which you want to be a maximum temperature of about 150°F to be tender and juicy. Yes, it’s true, it is below the government recommended 165°F, but I like to eat my turkey breast before it is dried out and stringy, and am willing to take the slight risk.
Once your turkey is reading the correct temperatures for the two locations, it’s time to get that bird out of the oven and give it a chance to rest.
6. Give it a Serious Rest!
This is one of the steps most often overlooked by home cooks and it’s an important one. Why?
Because without a rest, the turkey is too hot to carve easily, and all the lovely moisture you just
worked so hard to keep IN the bird will all come squirting out as soon as you carve it if you do not
wait.
The rest is the time for meat to redistribute its juices after that big hot cooking experience it just
went through. By letting it rest for 30 minutes to an hour, there’s time for the moisture in the meat
to get evenly distributed back through the entire bird giving you the tender juicy results you’re
looking for.


Leave A Comment